
how to record in obs studio
Open Broadcaster Software (OBS) Studio is a powerful, open-source tool that has become the go-to choice for streamers, gamers, and content creators alike. With its robust features and customizable interface, recording high-quality video and audio has never been easier. Whether you’re looking to capture gameplay, create tutorials, or record webinars, OBS allows you to do it all. In this article, we’ll walk you through the step-by-step process of setting up your recording environment in OBS Studio and provide tips to optimize your recording quality.
Step-by-Step Guide to Set Up Recording in OBS Studio
To get started with OBS Studio, the first step is to download and install the software. You can find the latest version of OBS on its official website. Once installed, launch the application and familiarize yourself with the interface. You'll see a scene collection by default, which is where you will set up your recording environment. To create a new scene, simply click the "+" icon under the "Scenes" box and name it according to your preference, such as "Gameplay" or "Tutorial."
Next, you’ll need to add sources to your scene. Sources are various elements that will be recorded or streamed, such as your screen, a specific window, or a webcam feed. Click the "+" icon under the "Sources" box and choose the appropriate source type. For example, if you’re recording your screen, select "Display Capture" and follow the prompts to select which screen you want to record. If you’re incorporating audio, ensure that you add "Audio Input Capture" for your microphone and "Audio Output Capture" for any game or system sounds.
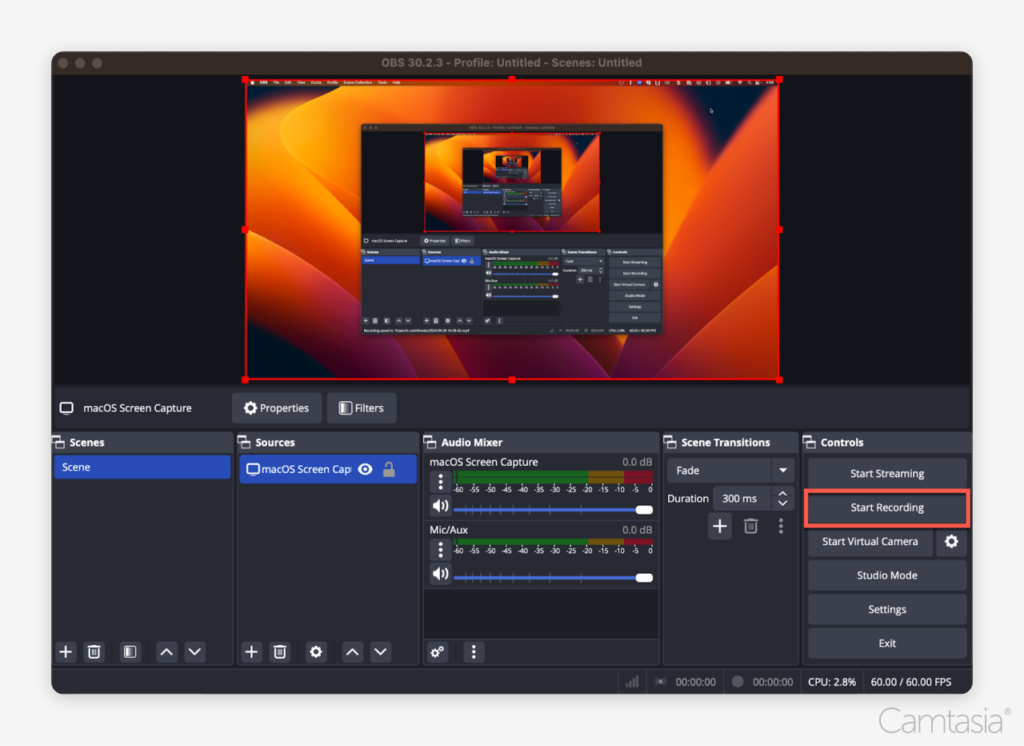
Once your sources are set up, it’s crucial to configure your recording settings. Go to “Settings” in the lower-right corner and navigate to the “Output” tab. Here, you can adjust the recording quality, format, and file destination. It’s recommended to use the MKV format for better recovery in case of crashes. Ensure that your bitrate settings are high enough for your desired quality—around 6000 Kbps is a good starting point for 1080p recordings. Finally, hit “Start Recording” to begin capturing your content!
Tips for Optimizing Your Recording Quality in OBS Studio
Optimizing your recording quality in OBS Studio involves a combination of hardware and software considerations. First, ensure that your computer meets the recommended specifications for running OBS and recording high-quality video. A powerful CPU and GPU will significantly improve your performance. Additionally, make sure you have enough RAM and disk space, as recording can consume considerable resources. If possible, use an SSD for faster data access and to reduce potential lag.
Next, pay attention to your audio settings. Clear audio is just as important as video quality. Invest in a good microphone and place it at an optimal distance to avoid distortions or background noise. In OBS, you can also add filters to your audio sources for noise suppression and compression. This can help create a professional sound quality that enhances the overall production value of your recordings. Don’t forget to monitor your audio levels to ensure they aren’t peaking into the red, which can cause clipping.
Lastly, consider the lighting and environment in which you record. For webcam inputs, proper lighting can make a significant difference in video quality. Natural light is great, but if that’s not available, invest in some softbox lights or ring lights for even illumination. Position your camera at eye level for a more engaging presentation. Lastly, always do a test recording before starting your main session to make sure everything looks and sounds the way you want it!
Recording in OBS Studio can seem daunting at first, but by following these steps and tips, you can create high-quality recordings that capture your content effectively. Remember that practice makes perfect; the more you experiment with the software, the more comfortable you’ll become. As you refine your techniques, your recordings will improve, making your videos more engaging and professional. Embrace the learning curve, and soon you will be creating stunning content that resonates with your audience!
Leave a Reply